
Mycelarium Best Upgrades: Order by Phase
The Mycelarium upgrade order that works: exchange-rate nodes first, systems second, mushroom multipliers last, with the reasoning for each phase.
The best Mycelarium upgrades are the ones that improve every future action, not the ones that unlock a new toy. Shot Range, Water Efficiency and the Absorber branch pay back within minutes; a mushroom yield node pays back only after you have built that mushroom and kept it alive. This guide ranks the tree by phase and explains the trade-offs.
The ranking assumes Exploration Mode and a first run. Survival Mode tightens the balance and removes the task bonuses, which pushes utility upgrades even higher.
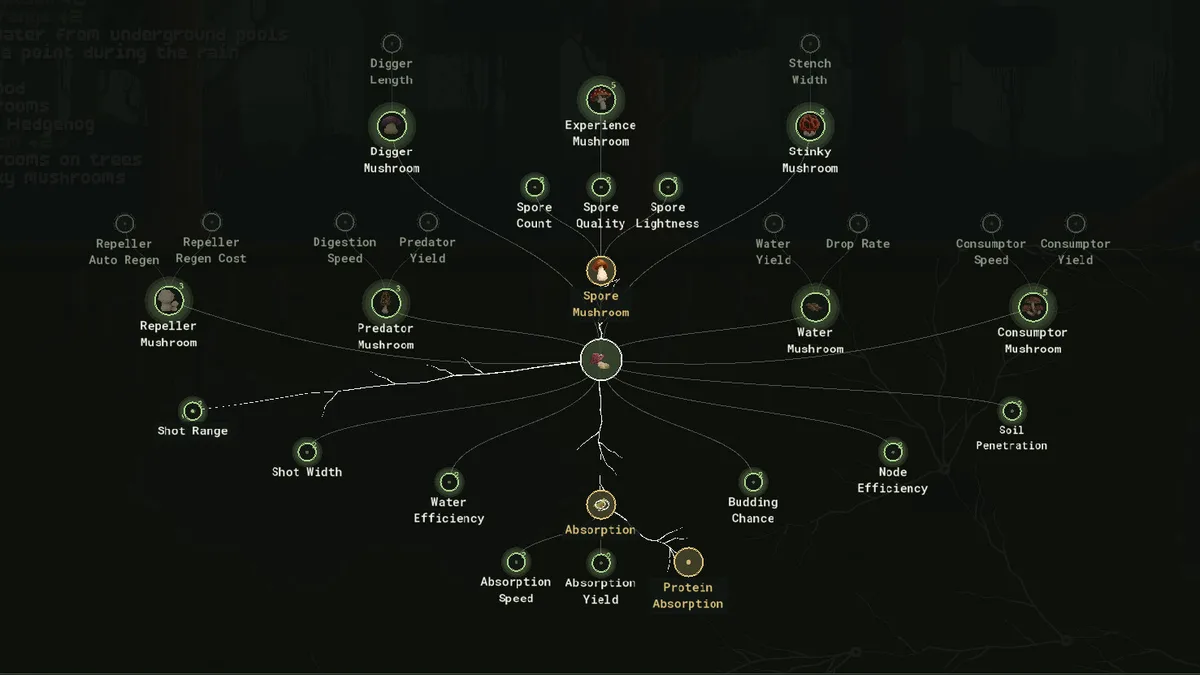
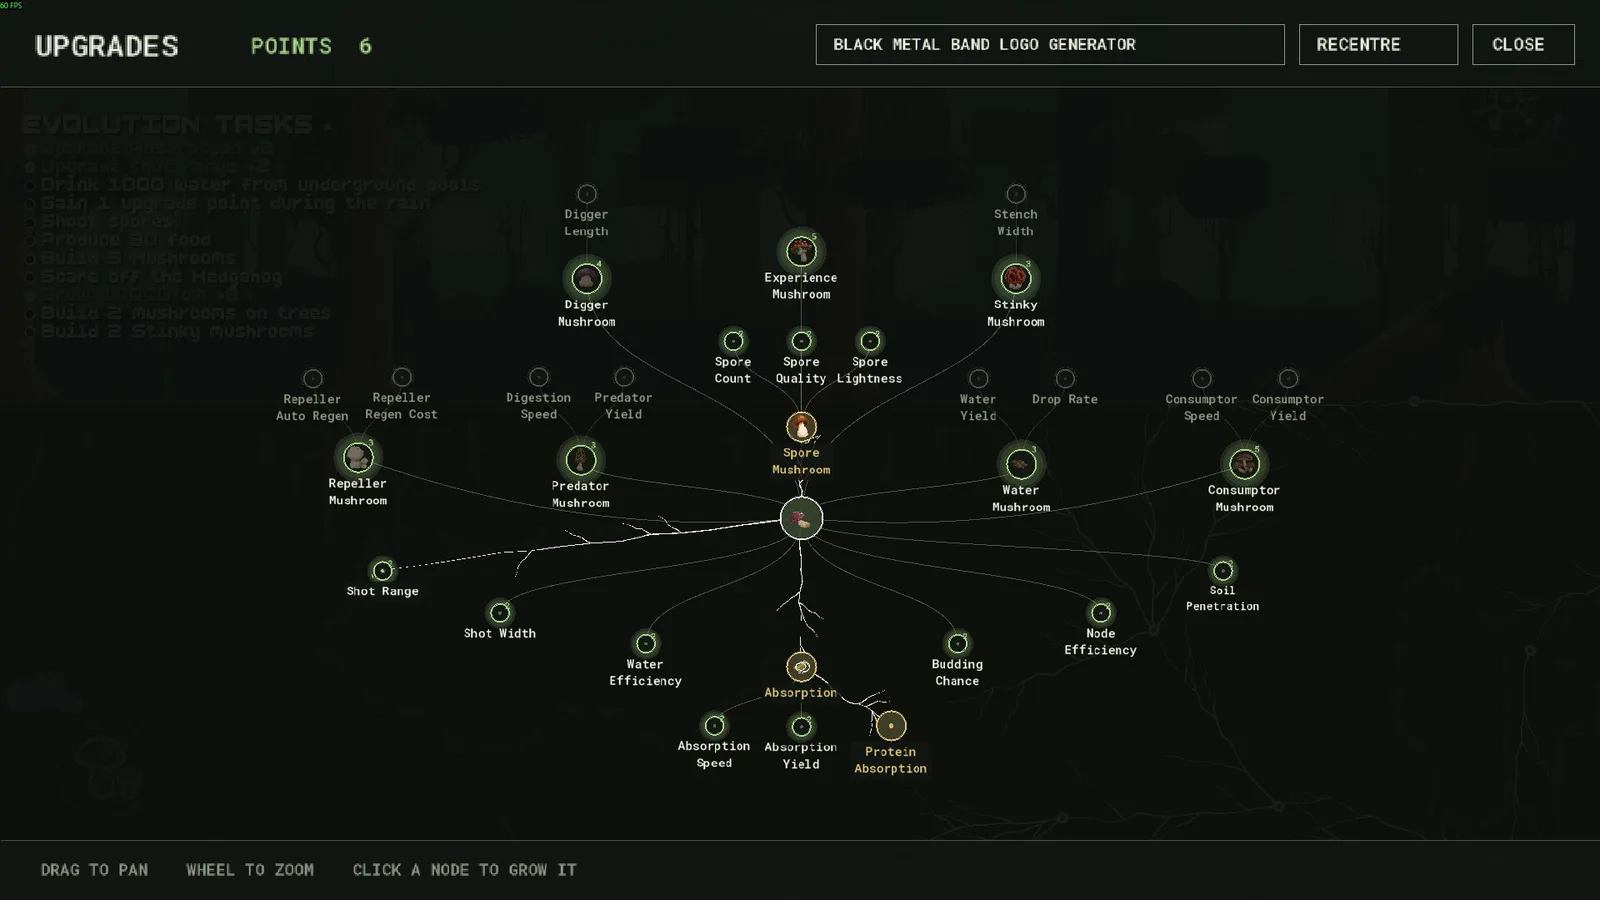
The short answer
Buy in this order:
- Shot Range (one or two points)
- Water Efficiency (one or two points)
- Absorber
- Soil Penetration (enough for the first layer)
- Absorption Speed or Node Efficiency
- Predator Mushroom branch
- Repeller Auto Regen
- Water Mushroom branch
- Everything else
The exact number of points per node is hidden until you hover it, so treat the list as an order rather than a budget. Points come from total length and from Evolution Tasks; the progression guide→ breaks down both income streams.
Phase 1: make every click cheaper
Shot Range and Water Efficiency are the two levers on the cost of distance. Range reduces the number of shots; efficiency reduces the price of each one. Together they turn a water-starved opening into a network that can reach the first pool without a detour.
Why not Budding Chance first? Because a chance-based extra branch is worth more when growth is already cheap. Early on, the same point in efficiency produces a guaranteed saving.
Why not Node Efficiency first? Because the opening problem is water, not food. Node Efficiency becomes strong once you are building mushrooms in numbers.
Phase 2: end the food famine
The Absorber is the upgrade that changes the run. It converts leaf litter into food without travel and without animals, which removes the most common stall in the game. Community reports put the unlock at three points, which is affordable after the first two utility nodes.
Follow it with Absorption Speed or Absorption Yield. Speed shortens the wait; yield increases the amount. For a network that is still small, speed feels better because the trickle arrives sooner. For a large network, yield scales better.
Rain windows and food pockets are map-dependent. An Absorber is not. Once it runs, a dry map cannot starve you.
Phase 3: open the underground
Soil Penetration is the gate on the first layer. One point is often enough to reach Brown Dirt; the second layer needs more. Buy it when you have a target, not because it is available.
A good target is a water pool or a magic shroom alcove visible through a gap in the stone. A bad target is "down". Penetration does not make stone free; it makes a route possible, and the route still costs water.
Phase 4: build the production engine
Once food and depth are stable, the mushroom branches become worth their points:
- Predator Mushroom — Digestion Speed and Predator Yield turn food production into a real income stream.
- Repeller Mushroom — Auto Regen keeps the defence running without manual re-triggering, which matters on a large surface.
- Water Mushroom — Water Yield and Drop Rate make deep pushes independent of pools.
Buy the mushroom node before its children. The tree requires the parent, and a child without the building is dead weight.
Phase 5: specialise
The remaining branches are for specific plans:
- Spore Mushroom — Spore Count, Spore Quality and Spore Lightness for long-range expansion.
- Consumptor Mushroom — Speed and Yield for tree farming.
- Digger Mushroom — Digger Length for tunnelling through hard soil.
- Stinky Mushroom — Stench Width for area denial.
- Experience Mushroom — no children; a standalone node.
These are not bad upgrades. They are expensive upgrades that only pay off if you use the matching mushroom. A player who never fires a spore should not buy Spore Quality.
What should you avoid?
- Buying a mushroom branch before the mushroom. No structure, no effect.
- Over-investing in penetration. Buy the layer you are entering, not the layer you might enter.
- Hoarding points for a big node. The cheap utility nodes compound while you save.
- Buying yield before speed on a starving network. Yield on zero production is zero.
How does the tree change in Survival Mode?
Survival Mode removes the evolution tasks, so points come from length alone and arrive more slowly. That makes the utility phase longer and the mushroom phase later. Players who know the tree can still rush production, but the margin for a bad purchase is smaller.
FAQ
What is the single best first upgrade?
Shot Range. It reduces the number of shots needed for every connection and makes the aim preview easier to use.
Is Water Efficiency better than Shot Range?
They are close. Range helps reach; efficiency helps afford. Buy one point of each before specialising.
When should I buy Soil Penetration?
When a pool or alcove is visible behind diggable ground. Buying it earlier is harmless but delays the Absorber.
Are mushroom upgrades worth it?
Yes, once the mushroom exists and is defended. Before that, they are the most common waste of points.
Official source: Mycelarium on Steam ↗ Official source: Update 1.02 notes ↗
The Steam discussions hub ↗ has player reports on fast runs and upgrade order; the achievement page ↗ shows which milestones most players reach first.